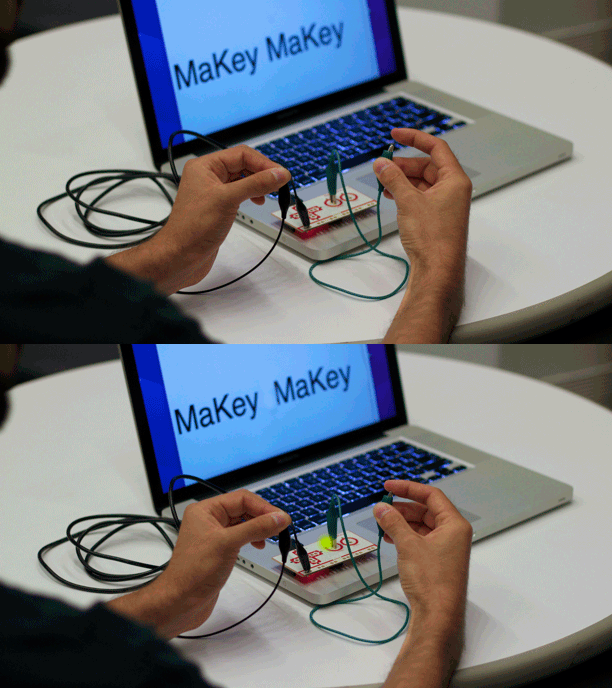
Makey Makey
The Makey Makey was my first experience with any type of Makerspace activity the one that started my love of all things makerspace. It has been my go-to and the one that I feel most comfortable with and I take every chance I get to bring it out to give others the chance to feel that feeling of accomplishment. When you have never tried anything like this before it is overwhelming and scary to try it out, I was so afraid that I would make a mistake. Little did I know that that is how you learn and making mistakes in a makerspace is how you learn and figure out how things work.
My colleague created the tutorial below and I use it with the kids. This station did present challenges for our students, however, they were looking for instant gratification and were discouraged by the need to read the instructions. If a student stuck with it and got it set up they loved being able to play the games.
The Makey Makey pairs very well with Scratch and the links to the games are all created in Scratch. I always encourage them to start with the piano and then move on to other games once they understand the basic concept of the Makey Makey.
What is the MaKey MaKey?
It’s an invention kit that encourages people to find creative ways to interact with their computers, by using everyday objects as a replacement for keyboards and mice. With the MaKey MaKey, you can replace the spacebar key on your keyboard with a banana, use play-doh to move and click your mouse, or high-five your best friend to advance PowerPoint slides. The possibilities are endless!
If you are interested in a more technical explanation, the MaKey MaKey is a two-sided circuit board. On the more simple, top side, the MaKey MaKey has 6-inputs: the up/down/left/right arrow keys, the spacebar and mouse left click.
By using the alligator clip cables included in the MaKey MaKey kit, clip the cables into the hole pairs to give you the computer functionality you need. If you flip the board over you’ve got access to 12 more keys - good to know for more advanced projects, but we won’t worry about those for today.
Setting Up your MaKey MaKey
Step 1: Plug in USB. Small side of USB cable plugs into MaKey MaKey, big side plugs into computer.
Step 2: Connect to Earth. Connect one end of an alligator clip to "Earth" on the bottom of the front side of the MaKey MaKey.
Step 3: Connect to Yourself. Hold the metal part of the other end of the alligator clip between your fingers. You are now "grounded." (Being “grounded” is an important step in using the MaKey MaKey.) 
Step 4: Connect to "Space" and Try It Out. While you're still grounded, touch the round "space" pad on the MaKey MaKey. You should see a green light on the MaKey MaKey blink the “space” pad is touched and your computer will think the spacebar was pressed.
Click anywhere in the text of this paragraph, and make the cursor move by touching the “space” pad on the MaKey MaKey with your finger. You can also complete the circuit by connecting another alligator clip to "space" as the diagram above shows.
Step 5: Connect Stuff. Now try making your own creation. Using the alligator clips connect your MaKey MaKey to bananas, play dough, marshmallows or anything conductive (even your friend) to manipulate your computer. Use scratch programs to have some fun!
Choose a scratch program below and pick an item to connect to your MaKey MaKey and get started! (Don’t worry...you’ve got this!)
Projects to Try: (Click the link to open the project you want)


Comments
Post a Comment